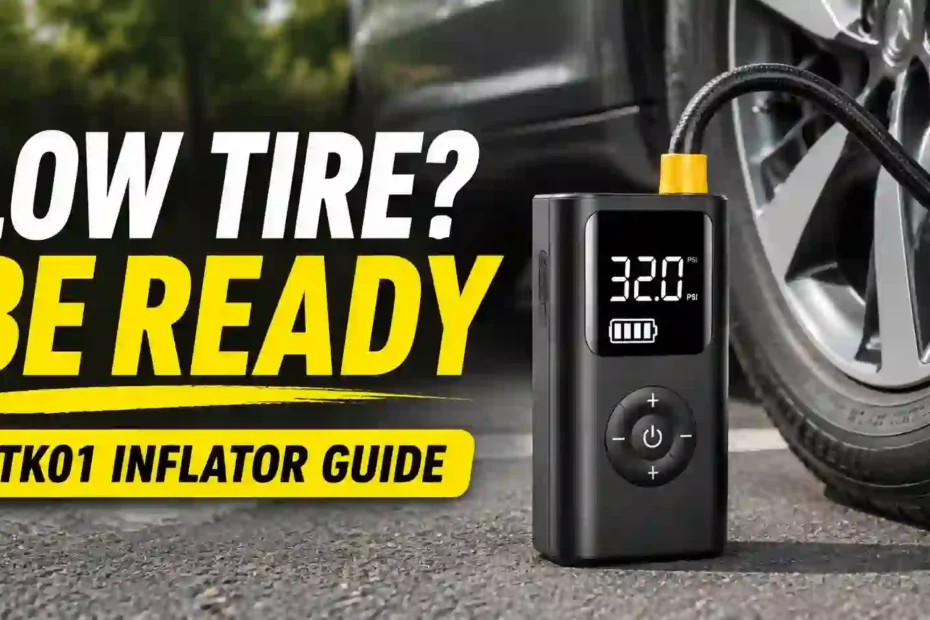
A low tire can interrupt your day and make driving unsafe. Guessing the right pressure or relying on a pump you have not checked can make the situation more stressful. The AOSKI NTK01 offers a portable way to add air, but knowing its limits matters. This guide explains how to use it, choose the right pressure, solve common problems, and decide whether it suits your needs.
What Is the AOSKI NTK01 Tire Inflator?
The AOSKI NTK01 is a rechargeable portable air compressor designed for inflating tires and other compatible items. Its listed features include a digital pressure display, an automatic shut-off setting, a built-in light, and a battery-powered design.
The main appeal is convenience. You can carry the pump in a vehicle or keep it at home without needing to find an electrical outlet each time a tire needs air.
AOSKI has advertised a maximum pressure of 150 PSI for this model. That is the pump’s listed maximum, not the pressure you should put in every tire. Always use the pressure recommended for the specific vehicle, bicycle, ball, or other item.
Quick answer: Is it worth considering?
It may be worth considering if you want a compact cordless pump for routine tire pressure checks and occasional top-ups. Before buying, confirm the battery details, included adapters, warranty, and return terms for the exact unit you are considering.
It is not a substitute for a tire repair, a roadside safety plan, or a larger compressor designed for demanding work.
NTK01 Specifications and Features at a Glance
Product information varies between listings carrying the same model number. The table separates features described in AOSKI listings from details you should confirm before purchase.
| Feature | What to know | What to check |
|---|---|---|
| Product type | Rechargeable portable tire inflator | Confirm that the exact package is cordless. |
| Maximum listed pressure | Up to 150 PSI | This is a pump limit, not a recommended tire setting. |
| Pressure display | A digital display shows pressure information. | Check which units and readings your unit displays. |
| Automatic shut-off | The pump is advertised to stop at a preset pressure. | Verify the final reading with a separate accurate gauge. |
| Power source | Rechargeable battery | Check battery capacity and charging requirements on your unit. |
| Charging connection | USB-C is listed for some versions. | Check the port and the charger requirements in the supplied instructions. |
| Built-in light | An LED light is listed. | Test the light before you need it at night. |
| Intended uses | Listings mention car, motorcycle, bicycle, and ball inflation. | Confirm the correct adapter and pressure range for each item. |
| Adapters | Accessories vary by listing. | Check the package contents rather than assuming a particular number. |
| Weight | One listing reports approximately 1.61 lb. | Verify if the weight is for the product or the packaging. |
| Warranty | Terms may depend on the seller and purchase location. | Read the warranty and return policy before ordering. |
Important specification note: One AOSKI listing describes three 2,000 mAh cells, while the sample product page describes a 20,000 mAh battery. Those figures should not be treated as interchangeable or assumed to describe every unit. Check the battery label, product identifier, and seller’s written specifications for the version you receive.
How Does the Portable Tire Inflator Work?
A portable tire inflator uses a small electric motor to compress air and push it through a hose. When the hose connects securely to a tire valve, air enters the tire and raises its pressure.
The digital display helps you see the pressure and set a target. On versions with automatic shut-off, the pump is designed to stop when it reaches that target.
That feature reduces the need to watch the number every second, but it does not make the pump foolproof. A loose connection, an incorrect pressure unit, a faulty gauge, or the wrong preset can still lead to a poor result.
Think of the pump as a tool for adding air. You remain responsible for choosing the correct pressure and checking the tire’s condition.
How Do You Use the NTK01 to Inflate a Car Tire?
Use the steps below as a practical guide. Button labels and operating details may differ between versions, so follow the instructions supplied with your pump when they differ.
1. Park in a safe place
Choose a level place away from moving traffic when possible. Set the parking brake and give yourself enough space to reach the tire.
If you are stopped on a busy road or in another unsafe location, prioritize your safety over using the pump. Move to a protected area if you can do so safely, or call roadside assistance.
2. Inspect the tire
Look for a flat tire, a bulge, a deep cut, exposed cords, or other visible damage. If you see serious damage or suspect the tire was driven on while flat or severely underinflated, do not assume adding air makes it safe.
A tire professional may need to remove and inspect it. Damage inside a tire is not always visible from the outside.
3. Find the recommended pressure
Look for the vehicle’s tire information label, usually on the driver’s door jamb, or consult the owner’s manual. The label may specify different pressures for the front and rear tires.
Use the recommended cold tire pressure for the tire you are checking. Do not use the maximum pressure printed on the tire sidewall as your everyday target unless your vehicle or tire manufacturer specifically directs you to do so.
4. Check the pump and hose
Make sure the pump has enough charge. Inspect the hose and connector for cracks or obvious damage, and attach the hose to the pump as directed.
For a standard car tire, use the connector intended for a Schrader valve. Remove the tire’s valve cap and keep it somewhere you will not lose it.
5. Connect the hose to the valve
Attach the connector firmly without forcing it. You may hear a brief hiss as you connect it, but continuous hissing usually means the seal needs attention.
If air keeps escaping, stop and reconnect the hose. Cross-threading or overtightening can damage the valve or fitting.
6. Select the correct unit and target
Turn on the pump and choose the pressure unit shown on your vehicle label, such as PSI or kPa. Select the appropriate mode if your unit has one, then adjust the target to the vehicle’s recommended pressure.
Do not assume a car-mode preset is correct for your car. Check and change the number before starting.
7. Start inflation and stay nearby
Start the pump according to its instructions. Watch the hose and listen for unusual sounds while the tire inflates.
If the pump becomes unusually hot, smells strange, makes a new grinding noise, or fails to build pressure, stop using it. Let it cool and check the instructions before trying again.
8. Stop, disconnect, and verify
When the pump stops at the target—or when you stop it manually—disconnect the hose carefully. The hose or connector may be hot after use.
Check the pressure with a separate accurate tire gauge. Add or release a small amount of air as needed, then replace the valve cap.
Example: If the door label calls for 35 PSI in a cold front tire, set the pump to 35 PSI—not 150 PSI. Check the rear-tire recommendation separately because it may be different.
Where Can You Find the Correct Tire Pressure?
For a car or light truck, start with the vehicle manufacturer’s tire information label. In many vehicles, it is on the driver’s side door jamb or door edge.
The label normally lists the recommended pressure for the original tire sizes. Your owner’s manual may also explain pressure requirements, including any adjustments for load or special driving conditions.
The U.S. National Highway Traffic Safety Administration recommends checking tire pressure when tires are cold and using the vehicle label or owner’s manual for the correct setting. It also recommends checking tires, including the spare, at least monthly.
Why the tire sidewall can cause confusion
A tire sidewall may show a maximum pressure associated with the tire’s construction or load rating. That number is not automatically the correct everyday pressure for your vehicle.
The vehicle maker’s recommended setting considers the vehicle and its specified tires. If your vehicle has different wheels or tires from those originally specified, ask a qualified tire professional which pressure applies.
Front and rear pressures may differ
A vehicle carries weight differently at the front and rear. Its label may therefore specify one pressure for the front tires and another for the rear tires.
Check each position instead of setting all four tires to a number you remember from another car. If the label offers separate recommendations for load conditions, follow the one that matches your use.
What Does “Cold Tire Pressure” Mean?
A cold tire has not warmed up from recent driving. NHTSA describes a cold tire as one that has not been driven for at least three hours.
Pressure rises as a tire warms during driving. That is why a pressure reading taken after a trip may be higher than the reading taken before it.
For routine maintenance, check and adjust pressure before driving, after the vehicle has been parked long enough for the tires to cool. Use the recommended cold pressure on the vehicle label.
What if the tire is low during a trip?
If a tire appears damaged, is losing air quickly, or has been driven while flat, stop safely and seek professional help. Adding air does not repair hidden damage.
If you have been driving and find a tire underinflated, NHTSA advises filling it to at least the recommended cold pressure on the vehicle label, then checking and adjusting it again when the tire is cold. Do not let air out of a warm tire simply because its reading is above the cold specification.
If you are unsure whether the tire is safe to drive on, use roadside assistance rather than guessing.
How Do You Read PSI, Bar, and kPa?
Pressure units describe the same physical measurement in different ways. The most familiar unit for many drivers in the United States is PSI, while other vehicle labels may use kPa or bar.
| Unit | Meaning | Approximate equivalent |
|---|---|---|
| PSI | Pounds per square inch | 1 PSI |
| kPa | Kilopascals | 1 PSI is about 6.9 kPa |
| bar | A metric pressure unit | 1 bar is about 14.5 PSI |
For example, 35 PSI is approximately 241 kPa or 2.41 bar. These conversions are rounded, so use the pressure and unit on your vehicle label whenever possible.
Before starting the pump, check that its display uses the unit you intend to set. Confusing 35 PSI with 35 kPa would produce a very different—and unsafe—result.
Which Modes Should You Use?
Some versions offer modes for common items such as car tires, motorcycle tires, bicycle tires, and sports balls. A mode can make the controls easier to navigate, but its default pressure is only a starting point.
Choose the mode, then check the number. The correct target comes from the item’s manufacturer or the vehicle’s pressure label—not from the pump’s preset alone.
Car mode
Use car mode for a compatible passenger vehicle tire, then set the front or rear pressure shown on the vehicle label. Check the actual reading after inflation.
Motorcycle mode
Use the motorcycle manufacturer’s recommended pressure for the specific tire and load. A motorcycle may have different recommendations for solo riding and riding with a passenger or luggage.
Bicycle mode
Check the bicycle and tire manufacturer’s guidance. Tire size, rider weight, tire construction, and rim limits can affect the appropriate pressure.
The sidewall often shows an allowable range, but it does not tell every rider the ideal setting. Do not exceed the tire or rim manufacturer’s limit.
Ball mode
Look for the recommended pressure printed near the ball’s inflation valve. Use the correct needle and inflate slowly because a ball requires far less air than a car tire.
Custom mode
If available, custom mode lets you select a target without relying on an item-specific preset. It is useful only when you already know the correct pressure and the item is suitable for this kind of pump.
Can the Pump Inflate Bicycle Tires and Sports Balls?
Yes, the pump may be used for compatible bicycle tires and sports balls when you have the correct adapter and know the recommended pressure. Check your package before assuming the adapter is included.
Bicycle valves: Schrader and Presta
A Schrader valve looks similar to the valve on a car tire. A Presta valve is narrower and commonly appears on road bikes and other bicycles.
A Presta valve usually needs its small top nut loosened before inflation and may require an adapter. Attach the appropriate fitting gently, inflate to the recommended pressure, remove the fitting, and close the valve afterward.
If the adapter does not fit easily, do not force it. Check the valve type and the pump instructions first.
Sports balls
A ball needle is thin and can bend or damage the valve if inserted carelessly. Use a suitable needle, follow the ball maker’s instructions, and stop at the specified pressure.
Because a ball has a small air volume, its pressure can rise quickly. Stay beside the pump and stop immediately if the ball begins to look distorted.
Other inflatables
A portable compressor may not be suitable for every inflatable toy, mattress, or pool item. Some require a high-volume, low-pressure pump rather than a tire inflator.
Check the item’s instructions and the pump’s supported uses. Never inflate an item when you do not know its pressure limit or cannot make a secure connection.
How Long Does the Battery Last?
The NTK01’s runtime depends on the battery in your particular unit and the work you ask it to do. Tire size, starting pressure, target pressure, temperature, and battery condition can all affect how much charge a task uses.
A small top-up from 32 PSI to 35 PSI requires less work than inflating a much larger volume of air. For that reason, claims about a fixed number of tires per charge are not a reliable promise for every driver.
Battery capacity figures also differ across product listings. Check the label on your pump and the instructions that came with it rather than relying on a single online claim.
A practical battery routine
- Fully charge the pump before its first planned use, following its instructions.
- Test it at home with a tire or another compatible item.
- Note how much charge remains after your usual task.
- Recharge it as directed by the manufacturer.
- Check the battery before a long trip.
Do not assume the pump can be used while charging unless the instructions for your unit explicitly allow it. Use a compatible charger and cable, and stop charging if the device becomes unusually hot or damaged.
How Long Does It Take to Inflate a Tire?
There is no single reliable inflation time for every tire. A tire’s size, starting pressure, target pressure, hose connection, and the pump’s condition all matter.
A nearly correct tire may need only a small top-up. A much lower tire needs more air and may take considerably longer.
Do not judge the pump’s speed by PSI alone. Maximum pressure describes how high a pump is listed to go; it does not tell you how quickly it can move air into a particular tire.
If inflation seems unusually slow, stop and check for:
- A loose hose connection
- A damaged or leaking valve
- A low pump battery
- A tire that is losing air
- A target pressure set in the wrong unit
- A pump that needs to cool
If the tire is severely underinflated or damaged, have it inspected instead of treating a slow refill as a normal maintenance job.
Is the Automatic Shut-Off Accurate?
The NTK01 is advertised with automatic shut-off, which is designed to stop inflation at the selected target pressure. That feature is convenient, but you should not treat it as a guarantee that the tire is exactly at the correct pressure.
A pump’s display can differ from another gauge because of gauge accuracy, hose pressure, connection quality, or measurement timing. Removing the hose can also release a small amount of air.
For a dependable final check, use a separate accurate tire pressure gauge after disconnecting the pump. If the reading is low, add a little air; if it is high and the tire is cold, release a small amount and measure again.
If the pump repeatedly stops far from the selected pressure, stop relying on its reading. Check the instructions, compare it with a known accurate gauge, and contact the seller or manufacturer.
How Do You Charge and Store the Inflator Safely?
Treat the inflator as a battery-powered device and follow the charging and storage instructions provided with your unit. The safest routine is simple: inspect it, charge it with compatible equipment, and keep it clean and dry.
Charging checklist
- Check the cable and charging port for damage.
- Use the input and charger specifications shown in the instructions.
- Charge on a suitable surface away from flammable materials.
- Keep the device away from water while charging.
- Disconnect it according to the manufacturer’s directions.
- Stop using it if the battery case swells, leaks, smells unusual, or becomes excessively hot.
Do not open or attempt to repair a built-in battery unless the manufacturer specifically authorizes that work. A damaged lithium-ion battery needs appropriate handling and disposal.
Storage checklist
Keep the hose and adapters together so they are easy to find. Protect the unit from moisture, crushing, and temperatures outside the limits in its manual.
A car trunk can experience extreme heat and cold. Check the manufacturer’s storage range before leaving the device in a vehicle for long periods.
Store the pump where it will not move around while you drive. A secured bag or compartment also helps prevent small adapters from getting lost.
What Should You Do if the Inflator Will Not Start?
Start with the simplest checks. A pump that will not run may have a low battery, an incomplete hose connection, an incorrect setting, or a fault that requires support.
| Problem | Possible reason | What to do |
|---|---|---|
| Display does not turn on | Battery is discharged or the power control was not activated correctly. | Charge the unit and follow the supplied start-up instructions. |
| Motor does not start | The selected target may be at or below the current reading. | Check the displayed pressure, unit, and target. |
| Air leaks at the valve | The connector may not be seated correctly. | Stop, disconnect, inspect the fitting, and reconnect gently. |
| Pressure does not rise | A poor seal, low battery, or tire leak may be present. | Check the connection and battery; inspect the tire if pressure continues to fall. |
| Pump stops early | The target may be wrong, the battery may be low, or a protective feature may have activated. | Check settings and charge. Let the unit cool if the instructions require it. |
| Display reading seems wrong | The wrong unit or a loose connection may be causing confusion. | Check the unit and compare with a separate accurate gauge. |
| Hose or body becomes very hot | The pump may have been running too long or under heavy load. | Stop, allow it to cool, and follow the stated duty cycle. |
| Tire loses pressure again | The tire or valve may be leaking. | Arrange a tire inspection; do not keep topping it up as a permanent fix. |
A duty cycle tells you how long a pump can run before it needs to rest. Do not assume a duty cycle from another brand or model applies to this one. If the supplied instructions do not state a limit, contact the seller or manufacturer before extended use.
Why Does a Tire Keep Losing Air After Inflation?
A tire that repeatedly loses pressure may have a puncture, a leaking valve, a damaged wheel, or another fault. The U.S. Tire Manufacturers Association warns that a tire requiring repeated reinflation presents a serious safety risk and should be inspected by a tire service professional.
Check the pressure again when the tire is cold and compare it with the recommended setting. If it drops noticeably, arrange an inspection rather than repeatedly adding air and continuing to drive.
Do not remove a nail or other object from a tire at the roadside. The object may be slowing the leak, and removing it can make the situation worse.
A professional can determine whether a tire can be repaired after inspecting it properly. Some damage, including internal damage caused by driving underinflated, may not be visible from the outside.
Can You Use It During a Roadside Emergency?
A charged portable pump can help with a minor pressure drop when the tire is otherwise safe and the location allows you to work away from traffic. It cannot repair a puncture or make a damaged tire safe.
Before using the pump, ask yourself:
- Am I safely away from traffic?
- Is the tire visibly damaged, flat, or rapidly losing air?
- Was the vehicle driven while the tire was flat or severely underinflated?
- Do I know the recommended pressure?
- Do I have enough battery charge?
- Can I reach the valve without placing myself in danger?
If the answer raises concern, call roadside assistance or a qualified tire service. A spare tire, where provided, must also be suitable for the vehicle and inflated to its own specified pressure.
Keep emergency supplies together, including your vehicle manual, an accurate gauge, and the pump’s hose. Check them before a trip rather than discovering a missing adapter beside the road.
What Are the Main Benefits and Limitations?
The NTK01’s strongest potential benefit is convenience: a rechargeable pump can help you check and adjust pressure without visiting an air station for every small top-up.
Its usefulness depends on the exact version, battery condition, and the types of tires you need to maintain. The following points can help you judge whether it fits your routine.
Benefits
- Cordless operation: You can use a charged unit without finding a nearby power outlet.
- Portable size: It is intended to be carried or stored between uses.
- Digital display: A screen makes it easier to read and set pressure.
- Preset shut-off: The advertised automatic stop can make inflation more convenient.
- Multiple uses: With the correct adapters, it can support different tire and ball valves.
- Built-in light: A light can help you see the valve in poor lighting.
Limitations
- Battery capacity is not consistent across listings: Verify the exact version.
- Inflation time varies: A large or very low tire places more demand on a small pump.
- A pump does not repair damage: A leaking or damaged tire still needs attention.
- Preset modes are not universal: You must set the correct pressure for each item.
- Accessory contents can vary: Check which hose and adapters are included.
- Gauge readings should be verified: Keep a separate accurate gauge available.
- Heat can limit use: Follow the manufacturer’s operating and cooling instructions.
These are practical considerations, not results from a hands-on product test. Actual performance should be measured using the unit you own.
Who Should Consider This Tire Inflator?
The pump may suit drivers who want a convenient way to handle routine pressure adjustments at home or before a trip. It may also appeal to households that maintain a car, a bicycle, and a few sports balls, provided the correct attachments are included.
It is most useful when paired with a good tire pressure gauge and a regular maintenance routine. A pump stored without charge or without its hose will not help much when you need it.
It may be a good fit if you:
- Want a cordless pump for occasional tire top-ups.
- Prefer a digital pressure display.
- Need a compact unit for home or travel.
- Are willing to check the final pressure with a separate gauge.
- Have confirmed the included adapters match your needs.
You may need another solution if you:
- Inflate large tires frequently.
- Need long periods of continuous operation.
- Require verified high airflow for demanding work.
- Want a pump for large, low-pressure inflatables.
- Need a dependable repair solution for a tire that keeps leaking.
For frequent or heavy work, compare the pump’s verified airflow, duty cycle, power source, and warranty with those of a larger compressor. Do not choose based on maximum PSI alone.
What Should You Check Before Buying?
Before ordering the NTK01, compare the exact listing with your needs. Similar product pages may use the same model number while presenting different battery details or package contents.
1. Product identifier and battery label
Check the model number, product identifier, voltage, and battery capacity. Ask the seller to clarify any difference between the listing and the packaging.
Battery capacity alone does not tell you how many tires the pump can inflate. A useful comparison also needs a clear description of tire size, starting pressure, target pressure, and test conditions.
2. Hose and valve compatibility
Confirm that the hose fits the tire valves you use. If you need a Presta adapter or ball needle, check that it is included or available separately.
Look at how the hose attaches to the pump and tire. A fitting should connect securely without requiring excessive force.
3. Pressure range and units
Confirm that the pump supports the pressures and units you need. Remember that the listed maximum is not an everyday target.
For a bicycle, check both the tire and rim limits. For a vehicle, use its recommended cold tire pressure.
4. Operating limits
Look for a stated duty cycle, cooling period, and temperature range. If those details are missing and you expect repeated use, ask the seller before purchasing.
5. Warranty and returns
Read who provides the warranty, how to request support, and whether return shipping is covered. Keep the receipt and packaging until you have checked that the pump and accessories work.
A clear return policy matters when product specifications are inconsistent. It gives you a practical way to resolve a mismatch between the listing and the unit you receive.
How Should You Maintain Your Tires Between Uses?
A pump works best as part of a regular tire-care routine. NHTSA recommends checking tire pressure at least once a month, including the spare if your vehicle has one.
Select a period of time when the tires are cool. Check each tire against the correct front, rear, or spare specification and inspect the visible tread and sidewalls.
Monthly tire-care checklist
- Park safely and allow the tires to cool.
- Look for the suggested pressures on the car’s label.
- Measure each tire with an accurate gauge.
- Adjust pressure where needed.
- Look for cuts, bulges, embedded objects, and uneven wear.
- Replace all valve caps.
- Record a repeated pressure drop and arrange an inspection.
Do not wait for the tire pressure monitoring system, or TPMS, to warn you. A warning light can indicate a significant pressure problem, but it does not replace a monthly gauge check.
If the TPMS light stays on after you correct the pressure, follow your vehicle manual. The system may need time to update, or it may require diagnosis.
What Common Mistakes Should You Avoid?
A few small checks can prevent many inflation problems. The most important is to choose the target pressure before attaching and starting the pump.
Using the pump’s maximum pressure as the target
A 150 PSI maximum is a device specification. It is not a recommendation to inflate a car tire, bicycle tire, or ball to that pressure.
Trusting a preset without checking it
A car icon does not know your vehicle’s load or tire specification. Check the number against the vehicle label every time.
Mixing up pressure units
PSI, kPa, and bar are different units. Confirm the screen and label use the same unit before you adjust the target.
Ignoring a damaged or repeatedly low tire
Air can restore pressure temporarily, but it cannot repair a cut, a puncture, a damaged valve, or internal tire damage. Arrange an inspection when a tire repeatedly loses air.
Running the pump without a break
Small compressors can heat up during use. Follow the stated duty cycle and let the pump cool as instructed.
Assuming all accessories are included
Adapters differ between packages. Check what is in your box and test the fittings before a long journey.
Frequently Asked Questions
1. What is the NTK01 used for?
The NTK01 is a portable rechargeable air pump intended for compatible tires and other items, including sports balls. The correct hose, adapter, and pressure setting depend on the item.
2. Can the NTK01 inflate a car tire to 150 PSI?
The NTK01 is advertised with a maximum of 150 PSI, but a car tire should be inflated to the vehicle manufacturer’s recommended cold pressure—not automatically to the pump’s maximum.
3. Does the NTK01 stop automatically?
The NTK01 is advertised with automatic shut-off at a selected pressure. Confirm the final pressure with a separate accurate gauge, since a preset stop does not eliminate all measurement error.
4. How do I charge the NTK01?
Charge the NTK01 using the port, cable, and charger specifications in the instructions supplied with your unit. USB-C charging is listed for some versions, but requirements should be confirmed on the device.
5. Can the NTK01 fix a flat tire?
No. The NTK01 adds air; it does not repair a puncture or hidden tire damage. A flat, damaged, or repeatedly leaking tire needs professional assessment.
6. Is the NTK01 suitable for a bicycle?
The NTK01 may inflate a compatible bicycle tire with the right valve connection or adapter. Check the bicycle tire and rim pressure limits before setting the pump.
Make Your Next Tire Check Count
A portable pump is most valuable when you know how to use it before a tire runs low. Find your vehicle’s recommended cold pressures, charge the pump, test the hose and adapters, and keep an accurate gauge nearby.
Set a monthly reminder to check all tires and inspect anything that keeps losing air. That small routine can help you spot a problem early and decide when it is time to call a tire professional.