Anime Drawings: Step-by-Step Guide to Mastering the Art
Staring at a blank page while the image in your head feels impossible to capture is frustrating. Your characters end up stiff, eyes lifeless, and proportions weirdly off. It doesn’t have to stay that way. You can grab a pencil and break the process into clear, learnable steps. This guide hands you the exact methods used by experienced illustrators to turn rough ideas into professional anime drawings full of motion and feeling.
What Exactly Defines the Anime Art Style?
Anime drawings stand apart because they exaggerate human features to amplify emotion and storytelling. The eyes grow larger and more detailed, mouths simplify into a single curve, and hair defies gravity in energetic spikes or flowing masses. These choices aren’t random. They trace back to early manga pioneers like Osamu Tezuka, who blended Disney’s expressive eyes with Japanese brushwork. Today, studios like Studio Ghibli and MAPPA push the style further by mixing soft watercolor backgrounds with sharply defined characters. Knowing this foundation helps you make deliberate choices instead of copying without understanding.
Essential Tools Every Anime Artist Needs
Your tool kit shapes how your anime drawings feel on the page. A mechanical pencil with 0.5mm 2B lead gives you control for fine facial features. Sakura Pigma Micron pens deliver crisp, archival ink lines that scanners love. For digital work, a Wacom Intuos tablet paired with Clip Studio Paint offers pressure sensitivity that mimics real pen strokes. Beginners often buy expensive supplies too early. You only need paper with a slight tooth, a decent eraser, and one pen to start building serious skill.
| Tool Type | Purpose | Recommended Pick | Budget Alternative |
|---|
| Pencil | Light construction lines | Uni Kuru Toga 0.5mm | Any HB mechanical pencil |
| Inking Pen | Final clean line art | Sakura Pigma Micron 05 | Copic Multiliner SP |
| Digital Tablet | Drawing directly into software | Wacom Intuos Medium | XP-Pen Deco 01 V2 |
| Software | Layers, undo, screen tones | Clip Studio Paint Pro | Krita (free) |
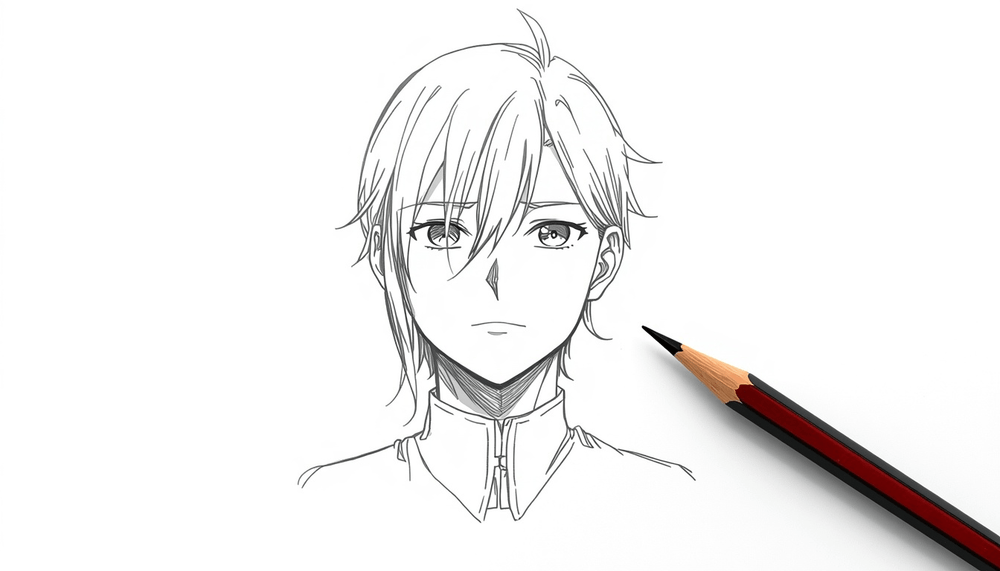
Mastering Anime Face Proportions
Every expressive anime face starts with a simple circle and cross guideline. Draw a circle, slice off the bottom into a pointed chin, then add a horizontal line halfway down for the eyes. A common mistake places eyes too high on the head, making the character look alien. According to Andrew Loomis’s Figure Drawing for All It’s Worth, the eyes sit exactly at the head’s vertical midpoint. In anime drawings, artists widen the eye spacing and lower the nose placement to create a youthful, approachable look. Practice this front view until you can sketch it in under two minutes, then rotate the head using the same cross.
Drawing Expressive Anime Eyes – The Secret to Emotion
Eyes carry the entire emotional weight of your anime drawings. Start with the upper lash line, a thick sweeping curve that dips slightly toward the center. The lower lid stays thinner and simpler. Add a large iris that touches both lids, leaving a small white highlight circle off-center toward the light source. The real magic lies in the eyebrow and eyelid fold. A slightly angled eyebrow combined with a half-closed lid communicates boredom or skepticism. Wide open eyes with multiple highlight dots signal hope or excitement. Betty Edwards’ research on visual perception shows that viewers scan eyes first, so getting this one feature right instantly elevates your entire sketch.
Anime Hairstyles: From Spikes to Flowing Locks
Hair in anime drawings breaks free from gravity to show personality. Spiky hair signals an energetic, determined hero. Soft, straight hair with face-framing strands suggests a calm, introspective character. Draw the hair as large clumps that flow from a crown point on the back of the head, never as individual strands. Think of each clump as a soft triangle or ribbon that tapers to a point. Clip Studio Paint’s official artist tutorials recommend building hairstyles in three layers: base silhouette, major shadow clumps, and small detail strands that catch the light. This method prevents the flat, helmet-like look that plagues beginner work.
Anatomy for Anime: How to Draw Bodies in Motion
Anime bodies often appear slim and elongated, but they still obey real anatomy rules. The average anime character stands about 6 to 7 heads tall, with shoulders measuring two head widths across. Richard Williams’ The Animator’s Survival Kit teaches that motion starts from the hips and torso twist, not the limbs. Sketch the line of action first, a single curved stroke that runs through the spine. Build the ribcage and pelvis as simple boxes angled against each other. Anime drawings use longer legs and narrower waists than realistic figures, but the underlying bone structure must feel solid. Use PoseManiacs or quick gesture drawing sessions to train your eye for dynamic poses.
Clothing and Fabric Folds in Anime Drawings
Fabric tells the story of movement underneath. Tight areas around the elbows, knees, and chest create tension folds that radiate outward in thin, sharp lines. Loose fabric forms drooping U-shaped curves. In anime drawings, artists often use fewer folds than in realism, selecting only the ones that emphasize action. A student uniform skirt flares with triangular fold shadows; a fighter’s jacket bunches in compressed zigzag patterns at the inner elbow. Study your own clothes in a mirror and trace where creases appear when you bend an arm. That direct observation builds an internal library that no tutorial can replace.
Step-by-Step: How to Draw a Complete Anime Character
Draw a gesture line capturing the pose’s energy.
- Block in the head with an oval and the torso with a soft rectangle.
- Add joint circles for shoulders, elbows, hips, and knees.
- Flesh out the limbs using tapered cylinders, thinner at the wrists and ankles.
- Place facial guidelines and sketch the eyes, nose, and mouth.
- Map the hair silhouette, keeping it big and bold.
Draw clothing over the body forms, adding essential folds.
Ink the final lines with confident strokes; let your hand lift often to avoid hairy lines.
This sequence prevents the common trap of perfecting an eye before the body pose exists, which destroys overall proportion.
Adding Depth: Shading and Coloring Your Anime Drawings
Flat anime drawings come alive with two shadow tones and one highlight. Pick a base skin color, then select a slightly darker, more saturated shade for the shadow under the chin, inside the hair, and beneath the sleeves. Cel shading, the classic anime technique, uses hard-edged shadows without gradients. Place a cast shadow from the hair onto the forehead to instantly create depth. The Tokyo University of the Arts published a visual analysis confirming that cel-shaded characters read faster and more emotionally than softly shaded ones, which explains the technique’s staying power in anime productions.
Digital Anime Drawings: Best Software and Techniques
Digital tools remove the fear of permanent mistakes. Clip Studio Paint dominates the anime world because of its vector layers that let you adjust line weight after drawing. Procreate on iPad offers a stripped-down, intuitive experience perfect for sketching anywhere. Use a canvas at 300 DPI and A4 size minimum for print-quality work. The stabilizer setting, usually found under brush options, smooths wobbly hand strokes into confident arcs. Build a layer stack: rough sketch, refined sketch, ink lines, flat colors, shadow layer, and highlight layer. This non-destructive workflow lets you experiment endlessly without ruining earlier work.
Common Beginner Mistakes in Anime Drawings and How to Fix Them
Skipping construction bones jump to complex details too soon. Your brain tricks you into focusing on the pretty eyelashes while the skull shape underneath collapses. Always build from simple forms first. Another frequent error is symmetrical character views. Faces drawn without slight head tilt or shoulder angle appear robotic. Tilt the head three degrees and drop one shoulder lower than the other. Finally, beginners draw hands smaller than they actually are. Use a simple check: a spread hand should cover the face from hairline to chin. Fix these three habits and your anime drawings will transform within a week.
Building a Consistent Anime Drawing Practice Routine
Improvement doesn’t require hours of grinding. Fifteen focused minutes daily beats one frantic Sunday session. Start with five minutes of gesture sketches from online reference sites like Quickposes. Spend seven minutes on a targeted study, rotating between eyes, hands, and fabric folds each day. Reserve the final three minutes for a small creative sketch just for fun. A study in the International Journal of Art & Design Education found that students who mixed structured practice with free creative play retained technical skills twice as long. Put your phone away, set a timer, and let the pencil move.
Finding Inspiration: Study the Masters of Anime Art
Look beyond popular shows to the artists who built the visual language. Yoshitaka Amano’s flowing, ethereal lines in Vampire Hunter D teach you how delicate ink work creates mood. Hayao Miyazaki’s storyboards show how environments and characters breathe together. Modern illustrators like Mika Pikazo use explosive color palettes that redefine anime drawings for a new generation. Follow them on platforms like Pixiv and Twitter, but don’t just scroll. Save images into an inspiration folder, then do a direct master study where you attempt to replicate one small section, analyzing every line decision as you go.
Sharing Your Art: Building an Audience for Your Anime Drawings
Posting your anime drawings online opens doors to feedback, commissions, and community. Pick one platform and commit to it. On Pixiv, tags matter massively; use specific ones like #originalcharacter #animeart. On DeviantArt, join groups dedicated to anime and manga to get early eyes on your work. Always reply to comments with gratitude and ask one simple question like “What part of the face feels strongest?” That interaction trains the algorithm to show your art to more people. Include a small signature and watermark nudged into a corner to protect your style as it grows recognizable.
Frequently Asked Questions
How long does it take to get good at anime drawings?
With daily mindful practice, you can draw a recognizable anime character within a month and produce polished, satisfying work within six months. True mastery continues to deepen over years as your observation sharpens.
What pencil is best for anime drawings?
A 0.5mm mechanical pencil with 2B lead works best for construction lines and initial sketches. It stays sharp, erases cleanly, and creates faint marks that disappear under ink.
Can I learn anime drawings without a drawing tablet?
Absolutely. Many professional manga artists still create anime drawings entirely on paper with pencils and dip pens. A tablet helps with coloring and editing but isn’t required for strong foundational skills.
What’s the difference between anime and manga drawings?
Anime drawings are typically designed for animation and use flat color with clean separation between layers. Manga drawings are created for print, relying heavily on black ink, screen tones, and varying line weights to describe shading.
How do I draw anime hands that don’t look awkward?
Break the hand into three blocks: palm, thumb base muscle, and finger group. Draw the palm as a rounded square, attach the finger group as a mitten shape, then separate into fingers at the very end. Study your own hand constantly.
Are there any free resources to improve anime drawings?
Krita software is free and powerful. YouTube channels like Proko cover essential anatomy, and websites like Quickposes and Line of Action provide free figure reference photos for gesture practice.
Conclusion
You now hold every tool to start filling blank pages with characters that feel alive. The difference between wishing you could draw and actually mastering anime drawings is simply starting today and staying curious through every awkward sketch. Grab your pencil, pick one technique from this guide, and spend the next fifteen minutes drawing. Then share your result with a friend or online community. Your next sketch could be the one that finally clicks.